La laurea è il traguardo di un percorso di studi intenso, fatto di piccoli passi e tanto impegno ed è giusto...
Blog categories
Search in blog
Latest posts
-
 Festa di laurea 20/05/2024Read more
 -
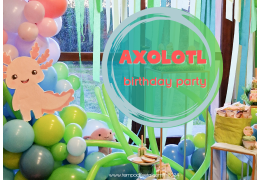 Axolotl, birthday party 2024/04/2219/04/2024Posted in: Events454 views 0 LikedRead more
An unusual theme chosen by Joanna for her birthday party that reveals her passion for axolotls, cute aquatic animals...
-
 Little Mermaid, birthday party 2024/04/1512/04/2024Posted in: Events256 views 0 LikedRead more
We take you to the bottom of the sea for Giorgia's 8th birthday with a themed party inspired by the Little Mermaid...
-
 Watercolor, birthday party 2024/04/1511/04/2024Posted in: Events234 views 0 LikedRead more
Soft colors and golden stars, the 13th birthday of a little woman has become a thrill to live with her closest...
-
 How to make a Harry Potter wand 2024/01/2424/01/2024Posted in: DIY projects709 views 0 LikedRead more
We recycle chopsticks from a Chinese restaurant to create Harry Potter magic wands.
Popular posts
-
 How to make a Little Donkey Piñata, Mexican Parties 2019/10/1814/10/2019Posted in: DIY projects20281 views 7 comments 0 LikedHow to make a Little Donkey Piñata, Mexican PartiesRead more
 -
 Customized party inspired by Spirit 07/31/201904/10/2019Posted in: Our party kits12679 views 2 comments 0 LikedCustomized party inspired by Spirit Stallion of the CimarronRead more
 -
 Masha and the Bear theme party 02/23/201830/09/2019Posted in: Community11396 views 0 LikedTo celebrate the 2nd birthday of her daughter, her mom organized a Masha and the Bear theme partyRead more
 -
 How to create the tin man 11/07/201728/09/2019Posted in: DIY projects10134 views 0 LikedHow to create the tin man from The Wizard of OZ using old tins, a very creative recyclingRead more
 -
 16th of February, day of impossible love 2022/02/1615/02/2022Posted in: Curiosities9770 views 0 LikedThe day of impossible loves was born to comfort all the broken and solitary hearts. If you enter in this category,...Read more


Latest comments