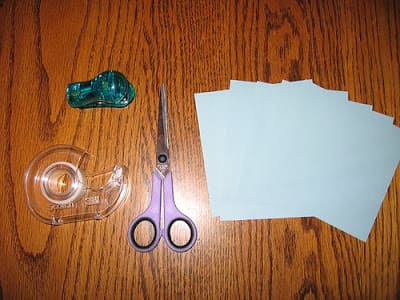
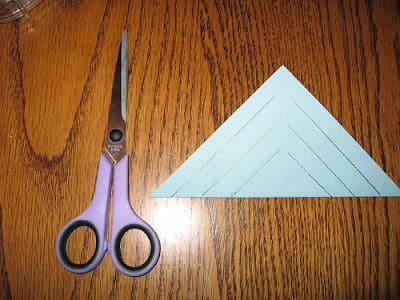
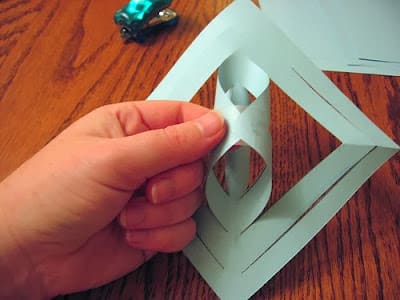
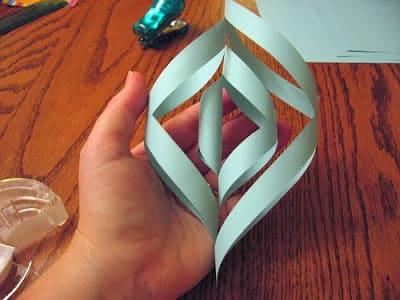
First Communion is a special moment in every child's and family's life. In this article, we show you 5 simple and...
Blog categories
Search in blog
Latest posts
-
 5 Simple Touches for a Truly Special First Communion 29/04/2025Read more
 -
 An Oceania-Inspired Party for Giorgia’s 9th BirthdayRead more
If your daughter loves Moana as much as Giorgia does, this birthday party will give you all the inspiration you need...
-
 St. Patrick’s Day: A Symbol of Luck and Prosperity Around the WorldRead more
St. Patrick’s Day is not just an Irish holiday. It is a perfect opportunity to celebrate luck, prosperity, and...
-
 17 YEARS OF TEMPO DI FESTA – A JOURNEY OF PASSION, INNOVATION, AND A CELEBRATION REVOLUTION 13/02/2025Read more
Discover our incredible story: 17 years of innovation and passion that have transformed the way celebrations are done...
-
 Welcome February: The Month of Love, Celebrations, and Our 17th Anniversary 02/02/2025Read more
February is a special month at Tempo di Festa: we’re celebrating Valentine’s Day and our 17th anniversary. Take a...
Popular posts
-
 How to make a Little Donkey Piñata, Mexican Parties 2019/10/18How to make a Little Donkey Piñata, Mexican PartiesRead more
 -
 How to create cardboard paper Butterfly Wings 2015/02/2016We’ll make cardboard paper Butterfly Wings, a last minute idea for a carnival costumeRead more
 -
 Customized party inspired by Spirit 07/31/2019Customized party inspired by Spirit Stallion of the CimarronRead more
 -
 Masha and the Bear theme party 02/23/2018To celebrate the 2nd birthday of her daughter, her mom organized a Masha and the Bear theme partyRead more
 -
 How to create the tin man 11/07/2017How to create the tin man from The Wizard of OZ using old tins, a very creative recyclingRead more


Latest comments